
WALNUT INK
FINDING WALNUTS

Black walnuts are at their bests at the end of the fall—they range from about the size of a cherry tomato to a clementine. Pluck from low branches when green, or find the rotting ones on the ground. Either way, you’re going to let them rot for a while in a double bagged paper bag. You might want to forage in gloves and old clothes, since the dark brown juice that they produce (which will eventually become your ink!) stains brilliantly.
This is about the rotted stage you’re looking for.

MATERIALS
You’ll need:
Glass container with tight fitting lid
Stainless steel pot (used only for ink/dye making)
Funnel (used only for ink/dye making)
Coffee filter or cheese cloth
2 cups of hot water
Around a dozen walnut hulls
3 tablespoons of white vinegar
1 TBSP salt
Wintergreen essential oil (3-6 drops)
Spoon (that you will only use to make ink) or stick for stirring
Rubber gloves (optional)

MAKING THE INK
In your large pot for ink making, add your walnut hulls (can have the nuts inside, or taken out to eat beforehand!) to 2 cups of water.
Heat to boiling, stirring often. The walnut hulls should want to fall apart in the water, but you might need to help them break apart with your spoon.
Boil for 2-3 hours, until the liquid in the pot has reduced visibly. Look for rich, woody brown coloration in the ink color. OR, use the sun as your reducing agent! Leave your walnut hulls in water and out in a sunny spot for 2-3 days. Save energy, and find a new way to experiment with inkmaking!
Once you’ve reached your desired color, filter your ink using a strainer or cheese cloth. For those that want a less “gritty” ink, strain again through a coffee filter balanced in your funnel straight into your glass container.
Add your wintergreen oil—walnut ink is prone to mold, and this acts as a fungicide to prevent it from growing. If the ink does form a layer of mold a few months or years down the road, don’t panic! It grows most often in a “puck” of mold. Remove it, and keep painting!

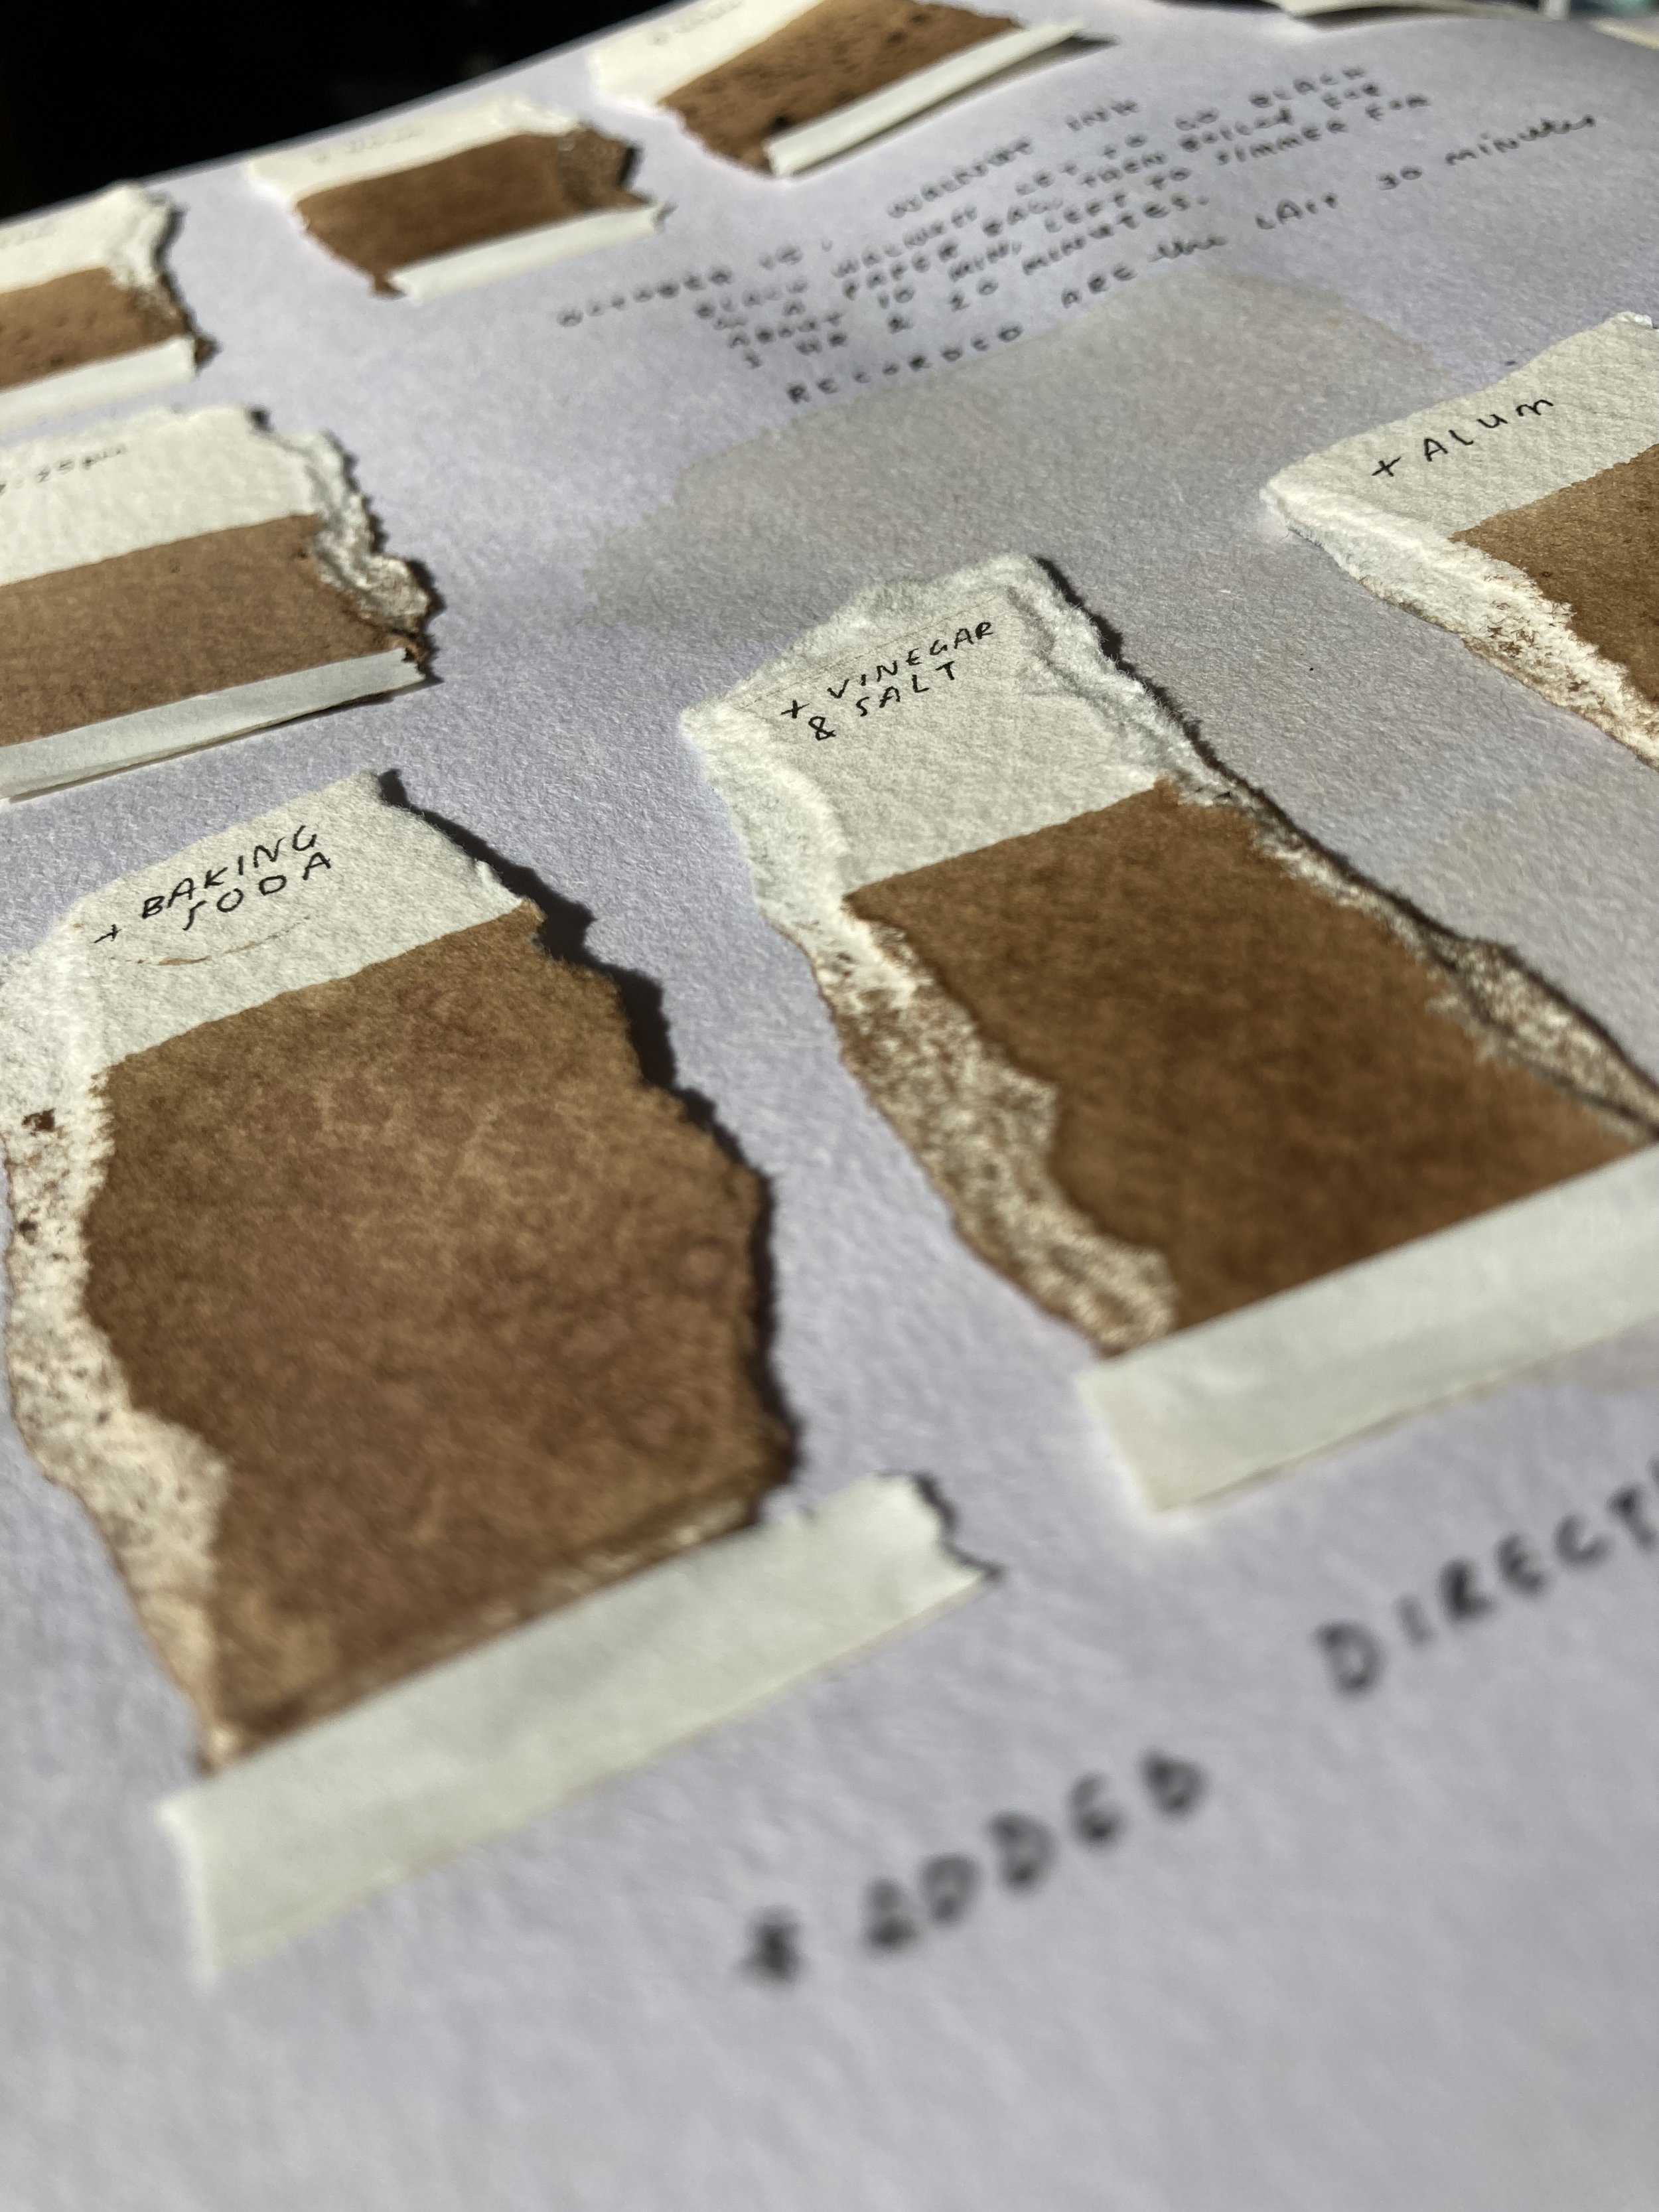
EXPERIMENTING
The more black walnut ink you layer, the darker it gets. I love the look that the subtle layers of brown give me, the patterns it lends to a piece as it dries. It’s a stubborn ink as far as additives go—but a sprinkle of iron, and you have a gorgeous gray, or add turmeric powder to the wet paint to get a freckle of gold throughout the piece!

